

Let’s put the bottom line right on the table. You want to hike Catalina Island, but you have zero clue how punishing this rock actually gets when the midday sun cooks the dirt. Hikers consistently underestimate the steep grades, ending up with shredded feet, bone-dry canteens, and totally ruined weekends. The fix is simple. Follow this exact 3-day Trans-Catalina Trail itinerary to crush the route without becoming another sad search and rescue statistic.
You are standing on a dusty, sun-baked ridge overlooking the Pacific Ocean, wild bison grazing to your left, and thirty miles of brutal, exposed island terrain standing between you and an ice-cold beer. The Trans-Catalina Trail destroys unprepared hikers every single season. Here is exactly how to conquer California’s most breathtaking island trek without shredding your feet, running out of water, or sleeping on rocks.

What Makes the Trans-Catalina Trail So Brutal?
Forget everything you know about standard California backpacking trails. The people who cut these paths hated switchbacks. They built the routes straight up the ridges and straight down the other side.
You face a relentless fall-line slog. Add total solar exposure to that equation. You get zero shade out there. The ocean winds batter your face constantly, drying out your skin and sapping your energy faster than a marathon.
Then you factor in the local residents. Massive, horned beasts roam freely across the hillsides. You will encounter them. They own the land, so you must yield the right of way. When you hit that first massive incline out of Avalon with the midday heat beating down on your neck and fifty pounds of unnecessary junk digging into your shoulders right before an aggressive herd of furry animals decides to block the only path forward, you realize real fast that this isn’t some casual stroll through a city park.
Securing Your Permits and Campsites (The Hardest Part)
Treat your trip planning exactly like a high-stakes weekend in Las Vegas. Amateurs walk into a casino, drop their entire stack on a random roulette spin, and go broke in five minutes. Backpacking Catalina Island works the exact same way. Rookies show up at the ferry terminal without booking Trans-Catalina Trail campsites, bet their whole weekend on finding random cancelations, and end up catching the next boat home completely defeated.
Play the house odds. You cannot just pitch a tent anywhere. The Catalina Island Conservancy strictly regulates overnight stays. You must secure reservations months in advance.
Hunt for open slots at Black Jack, Little Harbor, and Parsons Landing. Those three locations dictate your daily mileage. Check the portal daily. Lock in your dates the second you see green availability blocks. Grab your Catalina hiking permits simultaneously.
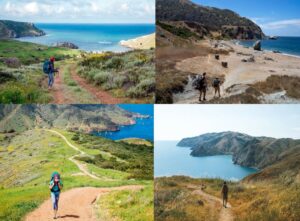
The Ultimate 3-Day TCT Itinerary
Here is your winning hand. Follow this daily breakdown to maximize your daylight and minimize your suffering.
Day 1: Avalon to Black Jack Campground (10.7 miles)
Step off the boat in Avalon and grab a quick coffee. Do not linger. The initial climb out of town hits you like a freight train. You gain serious elevation immediately, sweating through your shirt before you even clear the city limits.
Push through the Hermit Gulch switchbacks. Once you hit the spine of the island, the views explode. You see the deep blue ocean wrapping around the entire landmass. Keep your head down and grind out the remaining miles to Black Jack. You will find a reliable water spigot right near the pit toilets.
Day 2: Black Jack to Two Harbors via Little Harbor (13.5 miles)
Wake up early. Today features the highest highs and lowest lows. You start with a steep drop into Little Harbor. This spot holds the title for the most gorgeous beach in the state. Crystal clear water crashes against jagged sea stacks. Eat your lunch here.
Now comes the pain. The climb out of Little Harbor toward Two Harbors feels completely vertical. The afternoon sun will try to break your spirit. Drink constantly. Push over the final crest and drop into the village.
Two Harbors Catalina hiking offers one massive perk. A fully stocked restaurant waits for you at the bottom. Order a double cheeseburger and a famous Buffalo Milk cocktail. You earned the calories. Stumble to your designated dirt patch and pass out.
Day 3: Two Harbors to Parsons Landing and Back (14+ miles)
Leave your heavy gear in your tent. You only need day supplies for this final loop. The trail out of the village climbs aggressively up a razor-thin ridge. The wind howls up here. Keep your footing solid.
Eventually, you drop down onto Parsons Landing. This remote, rocky beach feels totally isolated from civilization. Enjoy the silence. Find your pre-assigned locker, grab your liquid rations, and take the flat, coastal dirt road all the way back into town. Grab your main pack and board the afternoon boat back to the mainland.
Packing List: Shedding Weight to Save Your Knees
Heavy packs ruin island trips. Traditional canvas domes and massive steel camp stoves will literally crush your joints on these vertical ascents. You need to strip your loadout down to the absolute bare minimum.
Buy ultralight backpacking tents. Swap your clunky metal sticks for lightweight carbon trekking poles. Every single ounce matters when you haul your life up a 2,000-foot dirt wall. Dumping your paycheck on high-end gear might feel ridiculous right up until the exact moment your knees start buckling on a steep gravel descent under the crushing weight of a massive pack that you absolutely didn’t need to bring on an expedition this demanding.
Ditch the massive leather hiking boots. They trap heat and cause horrific friction wounds. Wear breathable trail runners instead. Pair them with merino wool blister-proof socks to keep your toes intact.
Water Strategy: Don’t Mess This Up
Water represents your most valuable currency out here. Think of hydration like managing your betting chips at a poker table. If you blow all your funds early in the night, you get eliminated. If you chug your entire canteen before the hardest climb of the day, you risk serious heat stroke.
Map out the exact, reliable spigots. Hermit Gulch, Black Jack, Little Harbor, and Two Harbors all feature running pipes. Fill up completely at every single stop. Never assume the next stop works.
Parsons Landing has zero natural springs. You must purchase a key from the visitor center ahead of time to access a physical locker containing a gallon jug. Buy the best hiking hydration bladders you can find on the market. Carry a minimum of three liters on your back at all times.
Conclusion: Book the Ferry
Stop talking about doing this trek and actually pull the trigger. Secure your reservations today. Buy Catalina Express ferry tickets online right now to lock in your transportation. Grab your gear, hit the stair-stepper at your local gym, and get ready for the best physical test of your life. Drop a comment below with your planned start date or send this TCT itinerary to your adventure buddy to make them commit!
Frequently Asked Questions
How to book campsites on the Trans-Catalina Trail? Go directly to the Catalina Island Conservancy website. You must reserve specific dirt plots at Black Jack, Little Harbor, Two Harbors, and Parsons Landing months in advance through their online portal.
What is the best time to hike Catalina? Target late fall, winter, or early spring. November through April offers cooler temperatures and green hillsides. Summer brings dangerous heat waves and zero shade.
Where to get water on the TCT? Fill up at the public spigots located at Hermit Gulch, Black Jack, Little Harbor, and Two Harbors. For Parsons Landing, you must buy a locker key in advance to access stored jugs.
Are there bison on the Trans-Catalina trail? Yes. A large wild herd roams the interior. Give them plenty of space, never approach them for photos, and slowly walk around them if they block your path.
What is the best ultralight gear for Catalina Island? Focus on a sub-two-pound shelter, a lightweight quilt, trail running shoes, and a high-capacity hydration bladder. Keeping your total pack weight under thirty pounds saves your joints on the steep ascents.
Lorem ipsum dolor sit amet, consectetur adipiscing elit. Ut elit tellus, luctus nec ullamcorper mattis, pulvinar dapibus leo.