

Introduction: The Edge of California
Picture this: You are ten miles from the nearest road, the tide is aggressively rushing in, and your heavy boots are sinking deep into wet black sand as ocean spray blasts your face. The Lost Coast Trail isn’t your standard weekend nature walk through the redwoods. It is a brutal, unforgiving clash with the Pacific Ocean that demands total respect. Every season, naive hikers show up thinking California coastal hiking means a sunny stroll on the beach, only to find themselves utterly trapped by surging tides, shivering in wet sleeping bags, and begging the Coast Guard for a helicopter lift out of the King Range National Conservation Area as the giant waves just keep pounding the sheer cliffs without any mercy. The terrain eats cheap gear and spits out broken egos.
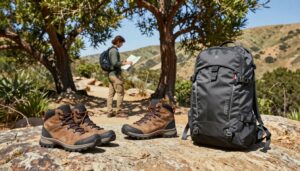
We built this complete Lost Coast Trail guide to keep you alive and comfortable. Stop guessing about ocean swells and start treating this trek like a tactical military operation. This breakdown delivers the exact blueprint for securing cutthroat Lost Coast permits, timing impassable choke points, and buying the exact rugged equipment required to endure relentless salt spray and howling winds. Read this brief, pack smart, and survive the wildest stretch of shoreline left in the state.
2. Permit Warfare: Getting on the Trail
Scoring Lost Coast permits feels exactly like trying to grab front-row concert tickets to a legendary reunion tour. Demand for premier California backpacking routes absolutely crushes the meager supply. You cannot just pack your bag on a Friday afternoon and drive up to the trailhead hoping for a walk-up spot. The rangers will instantly hand you a massive fine and kick you off the sand.
So, how do you actually get your boots on the dirt? You play the system aggressively. Permits hit Recreation.gov on a rolling basis exactly at 7:00 AM Pacific Time and you better have your credit card sitting right on your desk with your whole itinerary mapped out in your head. The second the clock strikes the hour, smash that refresh button and click your dates faster than a day trader dumping a bad stock. Hesitate for ten seconds, and your perfect summer vacation evaporates into thin air.

Missed the initial drop? Set up automated cancellation trackers. Grabbing a canceled spot requires checking your email obsessively and pouncing the second a notification hits your inbox. Target the shoulder season. October and November offer incredibly beautiful weather windows with a fraction of the chaotic summer crowds. You run a higher risk of getting caught in a nasty Pacific storm, but securing that golden ticket suddenly becomes a breeze. Figuring out how to get Lost Coast Trail permits is the very first test of your survival skills. It proves you have the grit to handle the actual physical punishment ahead.
3. Tide Charts: Don’t Get Swallowed by the Pacific
The Pacific Ocean does not care about your hiking schedule. Memorize this fact right now. The trail features three major impassable zones where the water violently smashes directly against vertical rock cliffs at high tide. Misjudge your timing here, and you will find yourself frantically clinging to a slippery boulder as freezing water tries to drag your exhausted body out to sea.
Learning how to read tide charts for backpacking is non-negotiable. Grab a printed NOAA graph explicitly tuned to the Shelter Cove area. Look for the negative numbers. A minus tide means the ocean has pulled way back, exposing wide strips of hard-packed wet sand that make walking infinitely easier. Enter those dangerous pinch points at least an hour before peak low tide. If low tide hits at 8:00 AM, break camp and start hiking fast by dawn. Clear the four-mile hazard zone well before the water starts surging back toward the bluffs and cuts off your only escape route.
Never turn your back on the ocean. Keep your head on a swivel. Sneaker waves routinely hit this exact coastline completely unannounced, surging twenty feet higher than the normal surf and violently sweeping massive driftwood logs up the beach like they are light toothpicks. I once watched a guy stop to snap a quick photo in the King Range National Conservation Area, totally ignoring the incoming sets, only to get blasted by a freak wave that instantly soaked his entire pack and completely ruined his expensive camera gear while his friends just stood there screaming at him to run higher up the bluff. Study those Lost Coast tide charts until they are permanently burned into your brain. Treat the incoming swell like a ticking time bomb. The second the tide turns, your window closes.
4. The Gear: Surviving Salt, Sand, and Wind
Sand gets into absolutely everything. The salt spray devours cheap zippers overnight. The wind will effortlessly snap flimsy tent poles right in half while you try to sleep. Pack heavy-duty, field-tested equipment.
Let’s talk about your feet. Beginners always hunt for the best waterproof backpacking boots for sand, assuming thick leather and Gore-Tex will keep their toes bone dry wave-hopping along the shore. That is a terrible rookie mistake. When a rogue wave inevitably crests over your knees, those waterproof boots instantly become hefty buckets of freezing ocean water that never dry out and you end up slogging through the remaining miles with giant painful blisters forming on every single toe. Ditch the clunkers. Buy fast-draining, highly breathable trail running shoes. Pair them with snug ankle gaiters to keep the pebbles out. Let the water flow straight through the mesh. Your feet stay light, you move much faster, and the fabric dries under the afternoon sun.
Next, fix your shelter. The coastal gusts out here frequently hit forty miles per hour, turning a cheap dome tent into a completely shredded parachute. Pack aerodynamic, wind-resistant 3-season tents built with thick aluminum poles and a low profile that hugs the dirt. Stake out every single guy line using deadman anchors buried deep in the beach. I saw a cheap fiberglass tent fold completely flat on a windy Tuesday night near Sea Lion Gulch. It forced a miserable couple to wrap themselves in a soggy rainfly until morning broke.
Secure your food. The local black bears are incredibly smart and patrol the camps nightly looking for an easy meal. Hard-sided, ultralight bear canisters are legally required by the rangers. Forget about hanging a bag from a tree. There are zero suitable branches down on the sand anyway. Stuff your high-calorie meals, trash, and sweet-smelling toothpaste into that plastic vault. Stash it fifty yards away from your sleeping bag downwind. Lock your gear down tight.
5. Trail Breakdown: Mattole to Shelter Cove
Most people tackle the route from north to south, keeping the relentless prevailing winds firmly at their backs. The whole trek is a physical grinder of soft sand, slippery boulders, and steep bluffs.
Miles 1-8: You start at the Mattole River estuary and immediately get blasted by the salty air. The first few miles are relatively flat, pushing past an old abandoned lighthouse that looks exactly like a spooky movie set. Enjoy the easy walking right now. Right around Punta Gorda, you hit your first major impassable zone. Time your crossing perfectly, hug the cliffs, and watch the elephant seals barking loudly on the rocks.
Miles 9-16: Welcome to the meat grinder. Spanish Flat offers gorgeous grassy bluffs, but soon you drop back down into miles of endless, slippery boulder fields. This section drains your mental energy fast. Every single step requires intense focus to avoid rolling an ankle on the loose, bowling-ball-sized rocks covered in slick green algae. When you finally hit Big Flat, you will feel like you just survived a fifteen-round heavyweight boxing match. Set up camp in the driftwood shelters, bandage your bruised toes, and watch the surfers catching isolated waves right off the point.
Miles 17-25: The final punishing stretch. You wake up sore, pack your sandy gear, and face the longest impassable zone on the entire route. For four solid miles, you are racing the incoming tide across deep, exhausting black sand that sucks the energy right out of your calves. Pushing past Gitchell Creek feels like running a marathon in wet cement, completely draining your legs as you desperately search the horizon for the first signs of civilization until you finally see the hidden town of Shelter Cove suddenly appear through the fog. Drag your battered body up the final dirt ramp. Toss your pack onto the pavement. Start hunting for a greasy cheeseburger.
6. Shuttles and Logistics
This hike is a straight point-to-point mission. You drop your car at the finish line in Shelter Cove, but the starting point at Mattole Beach sits a grueling two-hour drive away along insanely steep, winding, pothole-riddled mountain roads that will absolutely destroy your brakes and leave your passengers feeling completely carsick before you even take your first step on the dirt. Do not even think about hitchhiking. Traffic out there is practically nonexistent.
You need a hired gun. Book reliable Lost Coast Trail shuttle services months before your trip. Local drivers charge a steep premium for hauling dirty backpackers across the rugged mountains. That cash is worth every single penny for the sheer convenience. Secure your ride the exact same day you score your camping reservation. Those creaky vans fill up instantly. Pay the fee, enjoy the stomach-churning ride to the north end, and start walking south.
7. Conclusion & Call to Action
The ocean is brutal and unforgiving. Nailing down your complex permit strategy, rigorously studying those tidal graphs, and investing in high-quality gear separates the successful veterans from the miserable victims begging for rescue. Plan your logistics tightly. Buy the right shoes. Keep your eyes permanently glued to the crashing waves.
Ready to test yourself against the Pacific? Grab your permits on Recreation.gov right now. Upgrade your failing equipment using the gear links above. Run your gear through a shakedown hike. Drop a comment below telling us your absolute favorite California trail.
Frequently Asked Questions
Are dogs allowed on the Lost Coast? Yes, dogs are permitted, but bringing them is highly risky. The sharp rocks tear up their paws instantly. Rogue waves can easily sweep a small dog right off the beach. Leave the pup at home.
Is there fresh water on the trail? Plenty of coastal creeks flow straight down to the sand. Bring a high-quality water filter and treat everything you drink to avoid catching a nasty stomach bug from agricultural runoff upstream.
Can I hike it in winter? Technically yes. Heavy winter storms bring massive, deadly swells and sideways freezing rain that makes crossing the choke points completely impossible. Stick to the warmer months.