The sun doesn’t care about your Instagram feed. In California, light changes fast. From marine haze to desert starkness in just a few miles.
Getting the “golden hour” right is key. It’s like a market opening and closing for light. Missing it means poor photos.
Photographer Corey Arnold says shooting in Yosemite was tough. But he made the light work. That’s the challenge.
My own Sierra glow chase taught me a lesson. It’s not about warm tones. It’s about using the only free special effect.
Why does the Lost Coast light differ from Anza-Borrego’s canyons? It’s about weather, geography, and timing.
And don’t forget the pros. Climber Will Gadd says: “I don’t have a job without both the pro photographers I work with.” Even athletes need great photos.
This is your briefing before we head out. California’s landscapes won’t wait for you to learn.
Action Photography While Participating
Doing adventure photography while you’re in the action is a unique challenge. It’s like trying to write a poem while your house is burning. Your mind must juggle survival and beauty, a task that seems crazy.
You’re not just watching; you’re part of the action with a camera. Climber Will Gadd calls it a “fragile pact of trust.” The athlete must trust your vision, even when they’re in a precarious situation. Their doubts are part of the deal.
This intense setting often creates the real moments you seek. Photographer Corey Arnold found this on a highline. “The intensity… wipes away any self-consciousness.” When adrenaline takes over, fake smiles disappear. You become a part of the story, documenting it as you go.
So, how do you handle this? It comes down to three key things:
- Pre-visualization: Imagine the shot before you’re in it. Know your composition as well as your next move.
- Muscle Memory: Your camera settings should be second nature. Adjust later; focus on survival now.
- Embrace the Chaos: Sometimes the best shot is the one you grab in a split second. It’s the photo you almost missed because you were too busy staying safe.
This way of action photography accepts the chaos. It values the real moment over the perfect shot. Your camera becomes a partner, capturing the journey from the inside.
Weather and Lighting in Different Climates
California’s weather isn’t a problem for outdoor photography. It’s a creative partner waiting to be understood. Each climate zone teaches a unique visual language. Instead of chasing perfect weather, photographers learn to interpret the weather’s moods.
Desert light is extreme. The sun in Death Valley or Joshua Tree is very bright and aggressively contrasty. This harsh light creates graphic opportunities. Corey Arnold found ways to make this light work for his shots at Taft Point.
His trick was to use wide apertures for depth and find subjects that stand out against simple backgrounds. Desert dawn offers a brief, intense color palette. It’s about capturing transient color events, not landscapes.
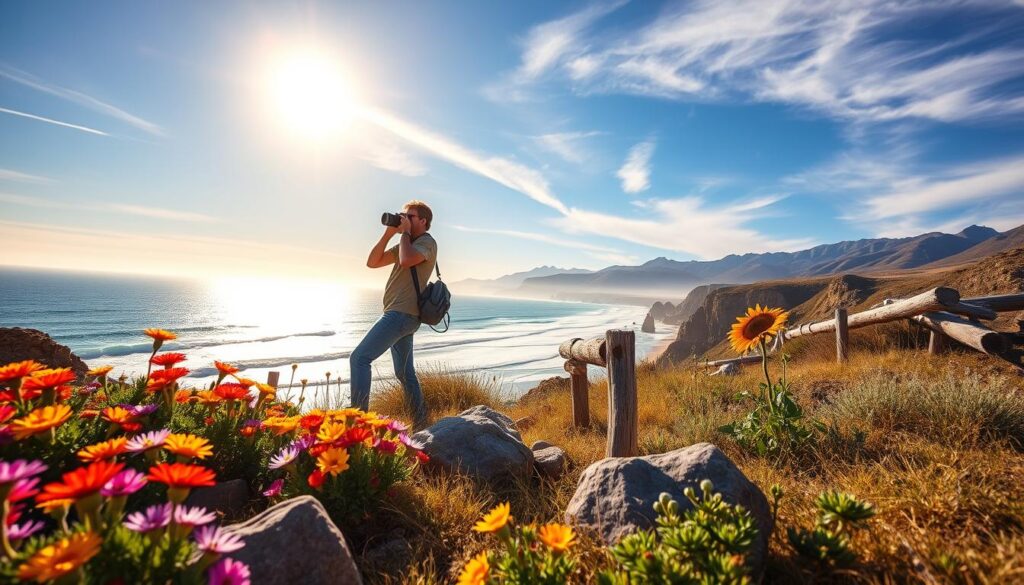
Coastal climates offer a different challenge. Marine layer fog in Big Sur or Point Reyes softens light into gentle, moody blankets. This light is subtle, textured illumination perfect for intimate scenes. The challenge is finding definition in uniformity.
Mountain weather adds drama. In the Sierra Nevada, conditions can change from clear to stormy in hours. This isn’t inconsistency—it’s narrative possibility. Storm light often delivers memorable outdoor photography California moments.
Each climate requires specific adaptations:
- Desert: Shoot early or late, use shadows, and embrace high contrast
- Coastal: Use fog for depth, look for subtle tonal variations, and shoot throughout the day
- Mountain: Monitor weather fronts, capture transitional moments, and use storms to your advantage
The real skill in California outdoor photography isn’t avoiding bad weather. It’s learning to speak every lighting dialect. Harsh sun, fog, and storm light all offer unique opportunities. Your camera doesn’t care about comfort; it cares about compelling images.
Next time you check the weather, don’t just see rain or shine. See the chance to create something new. The climate isn’t against your photography. It’s providing the raw materials for your next breakthrough image.
Protecting Gear in Harsh Environments
Think of your camera as a dignitary from a clean, dry place. You’ve brought it to a harsh environment. It needs climate control and gentle handling. But you’ve given it sandstorms, salt spray, and cold temperatures.
Will Gadd’s expeditions show the challenge. “My expeditions are cold, remote, and dangerous,” he says. “Cameras and fingers freeze solid.” When your camera can’t work because it’s too cold, your project fails.
Protecting your gear isn’t about being gentle. It’s about being ready for anything. Christian Pondella’s morning routine at -30º was more than just making sandwiches. It was keeping everyone alive and moving forward.
Your camera bag needs to be a clean room on the go. It’s not just carrying equipment. It’s keeping it safe from dust, water, cold, and salt.
| Environmental Threat | Immediate Risk | Low-Tech Solution | Pro-Tip |
|---|---|---|---|
| Sand & Dust | Sensor contamination, grinding in moving parts | Zip-lock bags as instant dust shields during lens changes | Keep a rocket blower handy. Never wipe a sandy sensor—you’ll scratch it. |
| Moisture & Humidity | Circuit corrosion, lens fungus, condensation inside elements | Silica gel packets in every compartment | Use gaffer tape to seal bag seams in sustained damp. A dry bag inside your pack is cheap insurance. |
| Extreme Cold | Battery failure, lubricant thickening, LCD screen death | Keep spare batteries inside your jacket, against your body | Before going from cold to warm, seal camera in a bag to prevent condensation inside the lens. |
| Salt & Sea Spray | Corrosion on metal parts, sticky buttons, ruined finishes | Microfiber cloth with distilled water for gentle wipe-downs at day’s end | A UV filter acts as a permanent sacrificial lens element. Let it take the abuse. |
| Impact & Vibration | Lens element misalignment, autofocus motor failure | Custom-cut foam inserts. Don’t let gear rattle. | When hiking, carry your camera on your body, not in a pack that gets tossed around. |
The table is more than a checklist. It’s a battle plan. Simple solutions like zip-lock bags and silica gel packets are effective. Gaffer tape fixes everything temporarily without leaving a trace.
This way of thinking is key. You move from worrying about bubble wrap to seeing protection as a skill. Just like Pondella’s sandwiches kept everyone going, your protective gear keeps your camera ready.
Your adventure photography kit should have two parts: creative tools and support tools. Ignore the second, and your camera becomes useless. In harsh environments, keeping your camera alive is your first job. Composition and light come second.
So, pack like an engineer. Use simple tricks to keep your gear safe. When you’re far from help, a dead camera is the last thing you want to hear.
Composition Tips for Epic Landscapes
Most landscape photos are like corporate mission statements: broad, impersonal, and forgettable. You’ve seen the usual shots: sunsets over mountains, perfectly centered, lacking emotional impact. Will Gadd offers a simple solution. “I look for something unique, layers to discover, and solid craft and composition.”
Composition is key to turning generic views into epic landscapes. It’s about what you exclude, not just what you include. Think of it as visual editing with a sharp eye.
Corey Arnold learned this from photographing highliners. He spent hours trying different angles. The breakthrough came from a close-up shot of Tyler, not a wide view.
This shot of Tyler focused and his friends watching created a perfect mix. The colors and Tyler’s concentration made it stand out. This shows how to use the human element to tell a story in your photos.
Guerrilla Tactics Beyond the Rule of Thirds
The rule of thirds is just the beginning. For epic landscapes, you need something more. Try these tactics:
- Cracks as Leading Lines: Look for cracks in rock or patterns in sand. They can guide the viewer’s eye.
- Foreground as Scale Story: Use small objects like backpacks or climbing shoes to show the scale of the landscape.
- Color as Character: Arnold’s use of pink and blue wasn’t accidental. It shows how color can add depth to your photos.
The Overwhelm Problem and Its Solution
The bigger the landscape, the harder it is to capture. Your brain gets overwhelmed. The solution? Edit before you shoot.
Ask yourself, “If I could only show one square foot, which would it be?” Maybe it’s a small wildflower or a misty pine tree. Epic landscapes often reveal themselves in small details.
This approach turns your landscape photography tips into an artistic journey. You’re not just documenting; you’re interpreting. Gadd’s “layers to discover” means creating images that reward longer viewing.
Remember, the best shots come from persistence, not luck. Arnold’s experience shows that focusing on details can lead to epic photos. Your best landscape photography tips often hide in the details everyone else overlooks.
So, forget the usual postcard shots. Look for the unique details that make a landscape special. Use the environment to create lines and shapes. Wait for the colors to pop. Your landscapes should feel like they were discovered, not staged.
Wildlife Photography Ethics
Wildlife photography is a delicate balance. The closer you get, the more you risk changing nature’s truth. In California’s diverse landscapes, every photo has a big impact. It’s not just about how it looks, but also about doing the right thing.
Adventure athlete Will Gadd said “legitimacy is very important” in outdoor sports. The public might not see the details, but over time, those who act with integrity earn respect. This is true for outdoor photography California lovers too. Your respect doesn’t come from getting too close to animals. It comes from taking photos that let them be themselves.
Imagine a surfer photoshopped into dead water or a coyote forced to pose. Both are fake. Ethical photographers always put the animal’s well-being first. But what does that really mean?
It means knowing when to stay back. Getting too close can disrupt important places for animals. This can make them stop acting naturally, which is what you want to capture.
Understanding animal body language is key. Many think an animal is okay if it doesn’t run away. But it might be scared or unsure. The signs are often small but clear.
| Observable Sign | Likely Meaning | Ethical Photographer’s Response |
|---|---|---|
| Constant vigilance toward you | Animal is stressed, not foraging or resting naturally | Increase distance immediately; use a longer lens |
| Abrupt cessation of normal activity | Your presence has interrupted essential behavior | Back away slowly; consider abandoning the shot |
| Vocalizations or alarm calls | Direct communication of distress to others | Retreat completely; you’ve crossed a boundary |
| Repetitive pacing or agitated movement | High anxiety, potentially displaced from territory | Leave the area; your impact is too significant |
| Parent animals shielding young | Protective stress; you’re perceived as a threat | Create maximum distance; never separate families |
This table is more than a guide. It’s a mirror. If you see these signs, you are the problem. The solution is to give animals more space.
Here’s a surprising truth about outdoor photography California style: your best shots are often from far away. You become a silent observer, not a controller. A distant shot of a condor soaring is more real than a close-up of a scared bird.
Your patience is your best tool. Waiting for animals to act naturally from a distance makes your photos real. There’s no rush to get close. Just the joy of capturing a moment that would have happened without you.
This way of shooting changes how you see yourself. You’re not chasing animals with a camera. You’re documenting with care. Your photos might not be as close-up, but they’re true. In a world full of fake images, being real is what matters most.
Social Media and Sharing Considerations
Instagram is more than just a photo album. It’s a digital world where a single tag can lead to a flood of visitors to a fragile place. Sharing your adventure photography on platforms like Instagram can be both a blessing and a curse. Corey Arnold found a key source through Instagram, but it came with a cost.
We’ve moved beyond just posting and hoping for the best. Every photo we share requires careful thought. Does that stunning photo of a hidden waterfall inspire or invite too many visitors? The line between sharing beauty and revealing too much is very thin. The impact of too much attention on a single spot can be harmful, turning peace into chaos.
The pressure to always post perfect photos is exhausting. Your followers want more than just beautiful pictures. They want the story behind the photo.
Will Gadd offers wise advice. “Images without homes are nice,” he says, “but you’ll soon run out of space on your own walls.” Your photos should serve a purpose, like educating or advocating for a place. Adding a story to your photos makes them memorable, not just fleeting moments on screens.
So, how do you share your outdoor work wisely? It’s about planning, not just quick clicks. Here’s how to share your outdoor photos with purpose.
| Sharing Tactic | The Possible Pitfall | The Smart, Ethical Alternative |
|---|---|---|
| Precise Geotagging | Directs overwhelming traffic to sensitive ecosystems. Contributes to trail erosion, litter, and wildlife disturbance. | Tag broadly (e.g., “Sierra Nevada” instead of a specific lake). Use captions to promote “Leave No Trace” principles. Encourage people to discover their own adventures. |
| Posting Rare Wildlife | Creates a “phenomenon” that draws crowds, stressing animals and altering natural behaviors. Prioritizes the photo over the subject’s welfare. | Share with a delay and from a distance. Focus the narrative on conservation status or interesting behaviors, not the exact location. Advocate for respectful viewing distances. |
| Crafting the Caption | A generic “Beautiful day!” caption misses the chance to engage and educate. It treats the image as mere eye candy. | Tell the micro-story. What was the hike like? What unique geology are we seeing? Mention a local conservation group. Turn the caption into a value-add, not an afterthought. |
| Building a Portfolio | Letting images languish on a hard drive or scatter randomly across feeds. They have no commercial or advocacy purpose. | Curate thematic series (e.g., “California’s Changing Coastlines”). Use your best work to approach local publications, galleries, or outdoor brands. Give your photos a professional home, as Gadd suggests. |
The goal isn’t to stop sharing. It’s to share with more thought. Your adventure photography has the power to tell deeper stories and protect the places you love. Make sure your digital footprint doesn’t harm the physical world.
Equipment Recommendations for Activities
Instead of asking ‘what’s the best camera?’, think about what tool you need for your outdoor adventure. This approach focuses on solving problems, not just collecting gear.
Corey Arnold shows us how it’s done. He used a large aperture to capture his coastal scene. It was the right choice for the job, not just a fancy feature.
Will Gadd emphasizes the importance of preparation. “Their packing system, their vision. That just takes repetition.” Your gear becomes second nature with practice, not endless research.
For serious landscape photography tips, the pros follow a simple rule. They aim for reliable results first, then seek the amazing shot. Your gear should help you achieve that every time.
What you need changes based on your mission. For example, coastal trekking, alpine climbing, or desert backpacking all require different gear.
For coastal trekking, you need to fight moisture. A weather-sealed camera is essential. A 24-70mm f/2.8 lens is versatile. Add a polarizing filter to reduce glare. A lightweight tripod helps against wind. Your goal is to stay mobile and protect against salt spray.
Alpine climbing means carrying the least possible. Choose one full-frame camera and a 24-105mm lens. Bring extra batteries, as cold kills them. A compact tripod is vital. Your pack is full of survival gear; your camera kit should be light and precise.
Desert backpacking is a battle against dust and extreme light. A dust-resistant camera is key. Use prime lenses and ND filters to manage the sun. Protecting your sensor is as important as capturing the scene.
| Activity | Core Challenge | Essential Gear | Philosophy |
|---|---|---|---|
| Coastal Trekking | Moisture & Changing Light | Weather-sealed body, zoom, polarizer | Mobile defense |
| Alpine Climbing | Weight & Cold | One body, one zoom, extra batteries | Brutal minimalism |
| Desert Backpacking | Dust & Extreme Contrast | Dust-sealed body, primes, ND filters | Sensor protection first |
The key isn’t the brand, but reliability. The best gear is what works when you need it most—the wave crashes, the light changes, the animal appears.
Build your kit for the chaos you’ll face. Practice until it feels like an extension of you. That’s the only advice that matters. The rest is just background noise.
Editing Workflow for Outdoor Photos
The edit is where your expedition becomes a story. Think of your chaotic download folder as unedited field notes. Your workflow is the process of turning those notes into a dispatch. It’s not about fixing bad photos. It’s about revealing the intent that was always hiding in the raw file.
Start with brutal culling. Kill your darlings so the strong may survive. Then apply global adjustments in Lightroom or Capture One. Respect the original light of the California scene. Did you capture the golden hue of the chaparral or the blue chill of an alpine lake? Your adjustments should honor that truth.
Local adjustments are for emphasis, not deception. A subtle vignette to guide the eye. A slight clarity boost on a mountain ridge. These are your final brushstrokes. For compelling outdoor photography California scenes, this disciplined approach separates snapshots from statements.
Will Gadd’s advice rings true here. “Get the job done first so you know you’ve got decent results.” Secure a set of clean, technically sound images before you experiment with artistic flair. This principle is core to any serious adventure photography practice.
This final step is where the analytical sage meets the storyteller. You synthesize the raw data of rock, water, and sky into a visual argument. Your best landscape photography tips live here, in the quiet space between the click and the share.